Introduction
This tutorial will teach you how to make your own diy usb rubber ducky using arduinos. If you don't already know, the usb rubber ducky is a keyboard emulation device and is treated as a keyboard by the computer, this allows you to inject keystrokes as if you are actually typing but at superhuman speeds.
Requirements
- A compatible board
- Micro usb male to usb male adapter
- A usb case for your board to make it more discrete (Optional)
Compatible Boards (as far as I know)
- Arduino Pro Mricro
- Arduino Leonardo
- Digispark
- Teensy 3.2
Steps
First download and install the arduino IDE from here.
If you are using a teensy you also need to download the Teensyduino add-on for the arduino IDE you can follow this guide on how to download and install the Teensyduino add-on.
Next download Duckuino, which is a Duckyscript to Arduino Converter the github link is here. It says the project is no longer maintained, however it still works fine.
Extract the folder from the zip and open the the index.html file.
It should open this webpage and you can type in ducky script on the left and it will be converter to arduino on the right after you click on compile.
Now just copy and paste the arduino script into your arduino IDE like so.
Before you upload your script to your arduino/teensy you need to make a few changes to ensure your script runs properly.
First you need to change the settings on your arduino IDE, go to tools and select which ever board you are using for example if you are using teensy3.2 then you need to select "Teensy 3.2/3.1", then change the usb type to "Keyboard" which is also under tools.
Then you need to make some adjustments to the script you pasted into the IDE as there are some issues with the ducky script converter, the first is it converts everything to caps, that can be a problem as "Windows key R" dosent work but "Windows key r" does, so if you want to open run command u need to use this.
All you need to do now is to plug in your arduino/teensy into your computer using your adapter and click on upload. The script will run immediately after being uploaded so just be prepared for that.
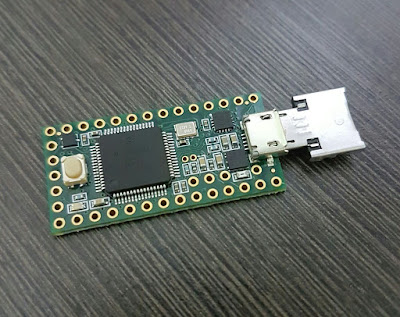
Here is my teensy 3.2 :)
I would recommend the adapter i'm using as it is very small and discrete.
Now every time u plug it into a computer it'll run the script immediately. You can visit this site for some inspiration on what you can do with this. Good luck and have fun!


No comments:
Post a Comment